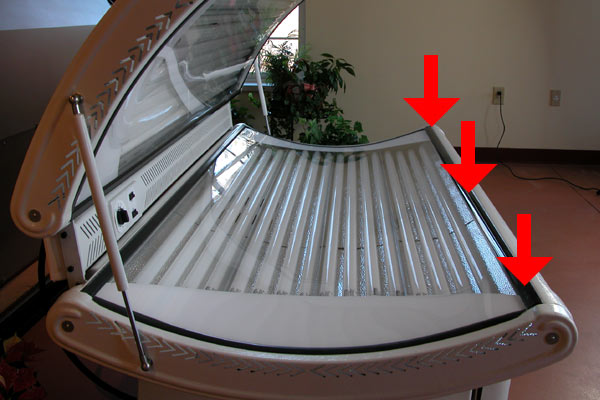
The purpose of this technical bulletin is to provide information to salon owners and distributors to perform the tasks of removing and replacing the acrylic and/or replace a ballast in the SunMaster 32. This bulletin applies specifically to the 2005-2007 models, but will apply to virtually every year model. Your ballasts and/or reflectors, or other parts may be slightly different than shown. BEFORE BEGINNING ANY OPERATION, YOU MUST REMOVE THE SM32 FROM POWER OF ANY KIND. This bulletin assumes you are a technician or certified electrician and you are familiar with basic electrical safety measures.
Removing The SMCOM32 Acrylic
To begin, you will remove the front metalic acrylic strip by using a Phillips screw driver to remove the 3 to 5 screws (depending on year) that hold the strip in place. Some years have a plastic retaining strip that must be removed by forcing one corner out and working down the strip.

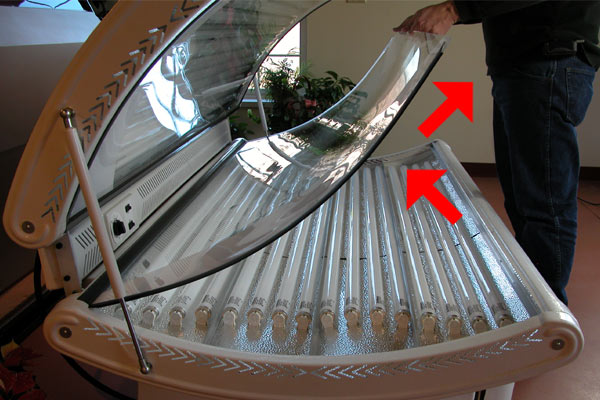
Replacing The SMCOM32 Acrylic
This is simply reversing the order that you removed the acrylic with, but there are a couple of notes worth knowing. First, if the metal strip was extraordinarily tight, you can use a screw driver and pry open the gap that the metal strip fits into slightly, all along the front of the bed. This will make removal/replacement easier. Next, when you go to replace the acrylic, you will start by placeing the back edge of the acrylic into the channel with the retaining strip (shown). This allows you to hinge the acrylic back into place quickly and easily.
Replace A Ballast In The SMCOM32
Remove the unit from power and remove the acrylic for the affected bed half (see previous). Put them in a safe place. In the center of the bed, where you will find the vent openings, you will notice one section is actually an access panel. There will usually be one or two screws holding it into place. Remove this screw and remove the panel above the affected ballast.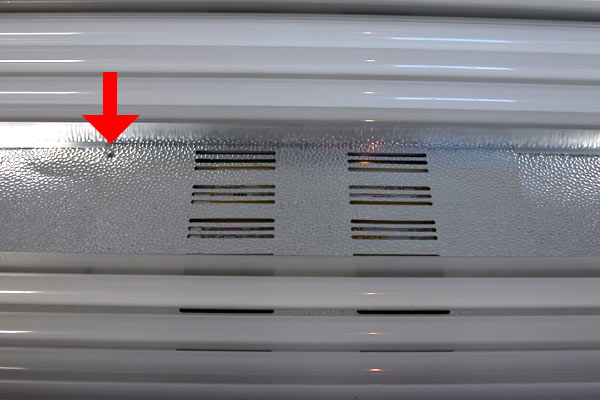
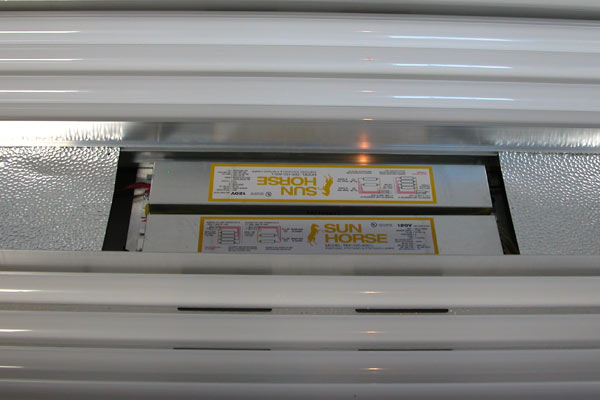
Once you have removed the panel, you can see the ballasts and simply remove and replace the defective unit. The ballasts are held in place with two screws. The easiest way is to use butt connectors, and seal properly, then reassembled the unit in reverse order.
Replaceing Lamp End Units On The SMCOM32
This method is not recommended for a simple ballast swap, but in the event you need to actually replace a lamp end, this is the approved way. First, ONLY REPLACE WITH GENUINE SUNMASTER LAMP ENDS. SunMaster lamp ends are wired differently (note the green color in the center of the lamp end.) Using a generic lamp end WILL result in premature lamp failure. Also, you can NOT use the SunMaster lamp end in any other brand of tanning bed, or failure will result. The proper part is inexpensive and can be ordered from SunMasterUSA at 1-800-274-1744.
Begin by following the same directions above to remove the acrylic and gain access to the ballast section. Note: The section of the reflector that holds the lamp end is one complete piece that is held in place by a single channel within the acrylic stiffener (the upright aluminum pieces).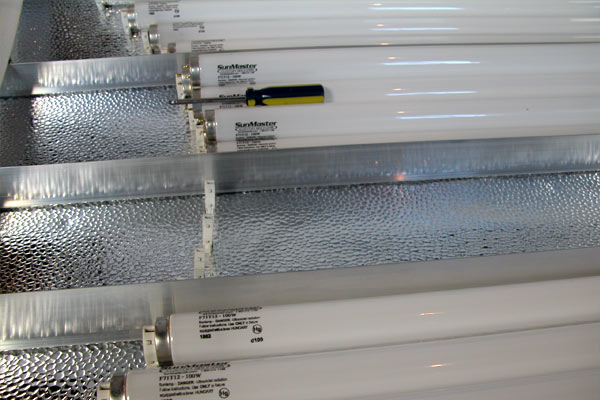
You will GENTLY push the entire section DOWN along the entire length, until it pops out of place. You can then remove the section, which will expose the wires and lamp ends under the section. To remove the lamp holder, simply grip the lamp holder on the front end (where the lamp would be), press IN firmly, and push through the aluminum reflector/bracing.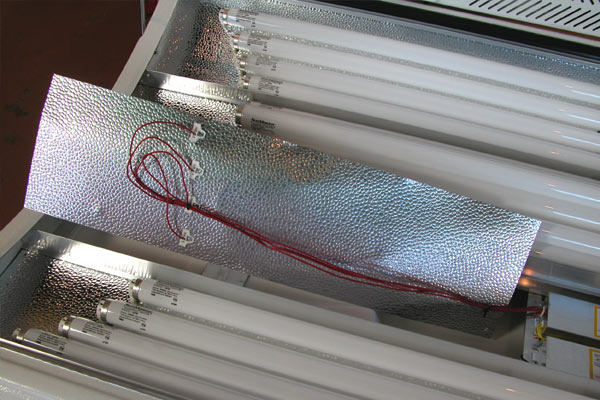
To remove the existing wire in the lamp holder, you need to take a paperclip, straighten out a length, push it into the same hole as the wire you want to remove on side of the hole, then pull the wire and paperclip out. Push the wire into the new lamp holder, replace the lamp holder by pushing it back into the reflector material, then reassemble the bed.
When replacing the reflector section, you should first install one complete side into the proper groove, slide toward the END of the bed, then gently push down along the entire length of the material until it pops into place. The rest of the reassembly is self explanatory.
Version 1.0 dlb 2-7-2007