This page is to replace the instructions in the SunMaster Owners Manual that refers to removing and replacing the acrylic in your new SunMaster tanning bed. This page demonstrates the correct method for removing and replacing acrylics on all 2004 and newer models. Please print this out for future reference.
Unplug or remove the tanning bed from power before you begin. Take a flat blade screw driver and put it against the lip of the acrylic strip on the front of the tanning bed, at one corner. Gently tap the back of the screw driver just enough to cause one corner to come loose. Once loose, gently pull the strip toward the front of the tanning bed to remove it. Once you have done this, you may now hinge the acrylic up and down. If the acrylic is held too tight to lift, you may need to work one corner up gently. Be careful to not touch or scratch the acrylic with the screw driver.

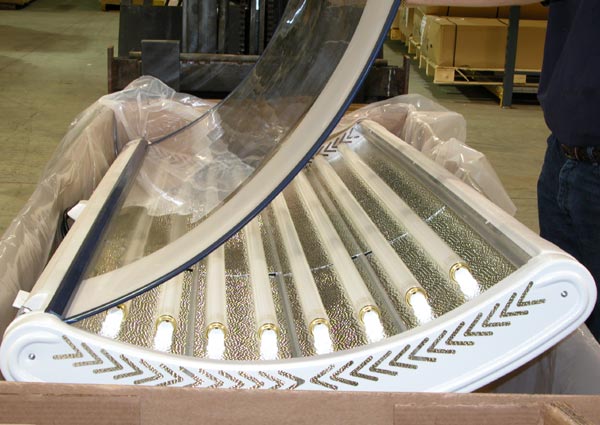
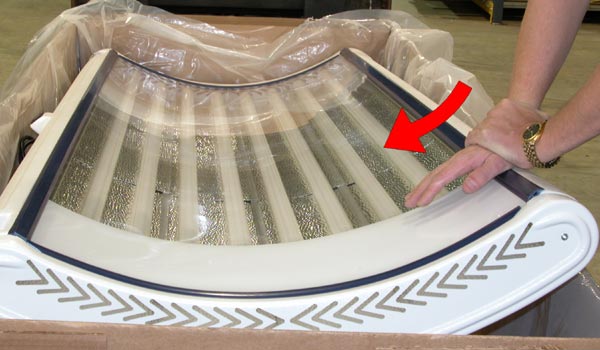
Carefully lift the acrylic as shown below. Now you can clean inside or replace the lamps in the tanning bed. A second person holding the acrylic open will be helpful. Be careful to not pull the acrylic forward. If this happens, simply replace the back ends into the slot opening. Now is a good time to also clean the back of the acrylic with an approved cleaner. When finished, lower the acrylic into its original position. You may need to push the center of the acrylic to get it to “pop” into place.

Once the acrylic is in place, you can replace the strip by inserting one end in the slot as far toward the end of the tanning bed as is reasonable, and push into place. Do not force it. A “down and back” or “scooping” motion works best, pushing the strip down and toward the back of the tanning bed at the same time. Work your way toward the other end of the strip using this same motion until the acrylic strip is aligned properly and firmly in place. You may now reconnect power to the tanning bed and use it normally.

From the owners manual: Revised 12-18-2003
This page created 2-5-2004 -dlb